Schedules
This screen allows management of bot schedules on the platform. A schedule defines when and where a bot should be executed automatically, without the need for manual intervention.
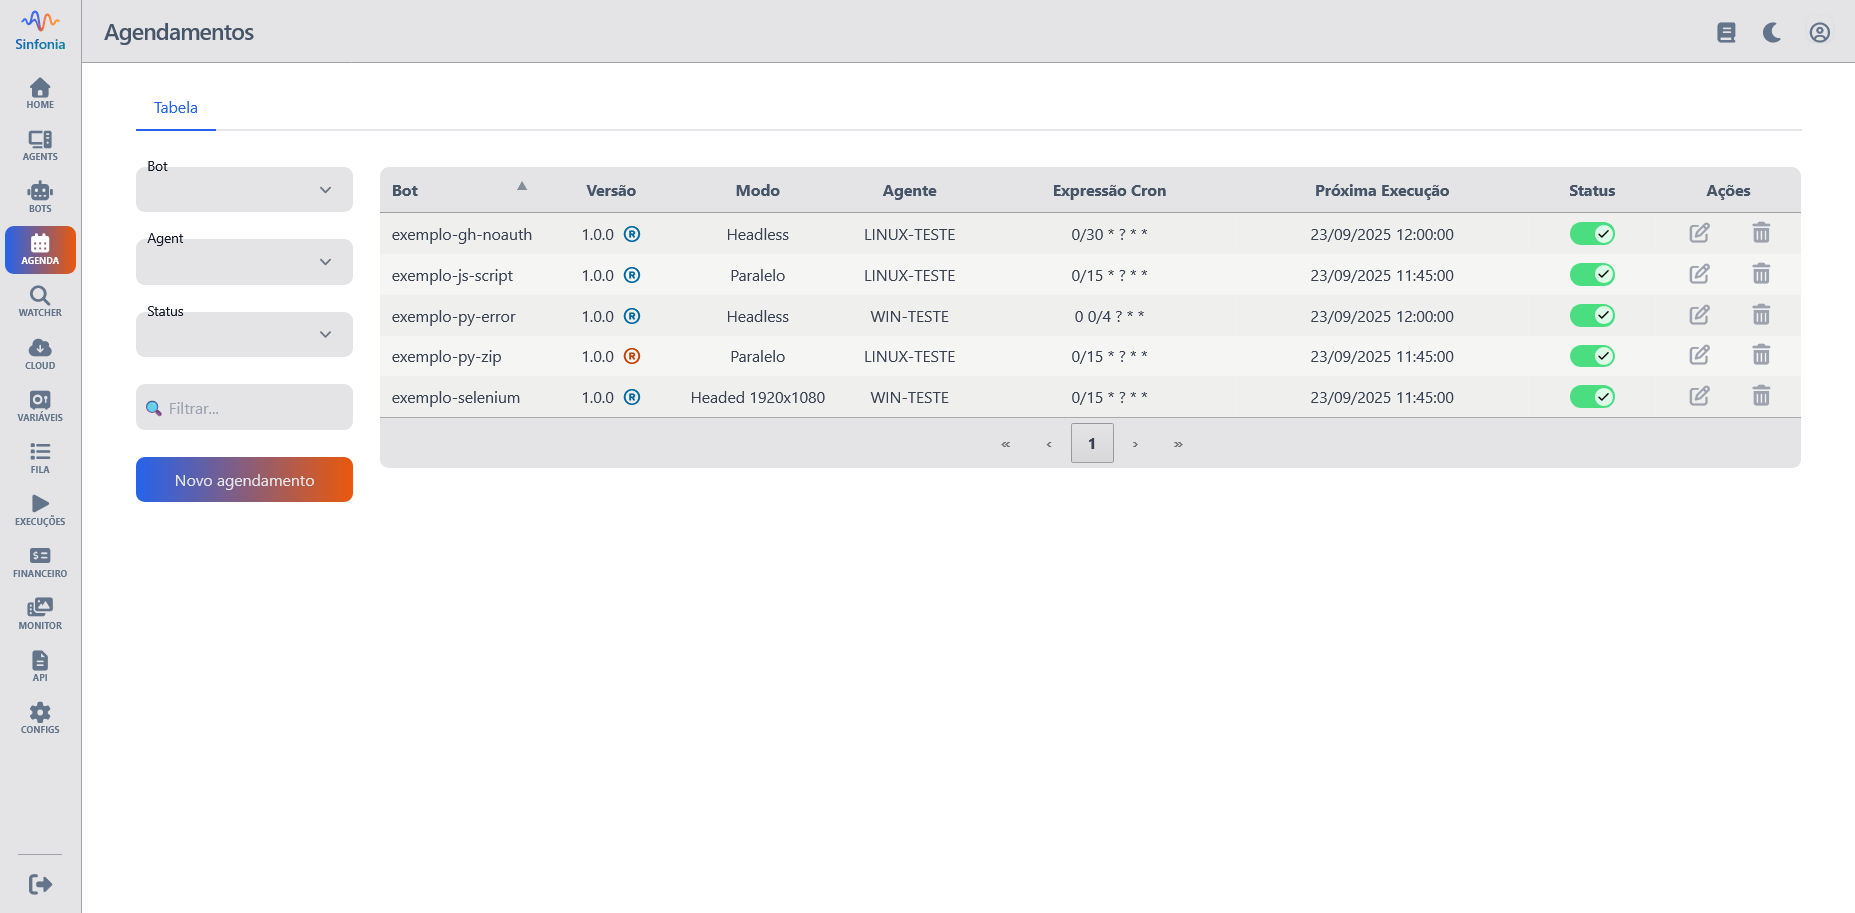
Data Table
| Field | Description |
|---|---|
| Bot | Name of the bot associated with the schedule. |
| Version | Specific version of the bot scheduled for execution. |
| Mode | Execution mode (headless, parallel, interface). |
| Agent | Agents configured for the schedule. |
| Cron Expression | Configured cron expression. |
| Next Execution | Indicates the date/time of the next job execution. |
| Status | Indicates whether the schedule is active or inactive. |
| Actions | Item actions Edit, Delete. |
Filters
| Filter | Description |
|---|---|
| Bot | Filters schedules by bot |
| Agent | Filters by agent |
| Status | Filters by ON/OFF status |
New Schedule
Below is the description of the fields needed to configure a schedule.
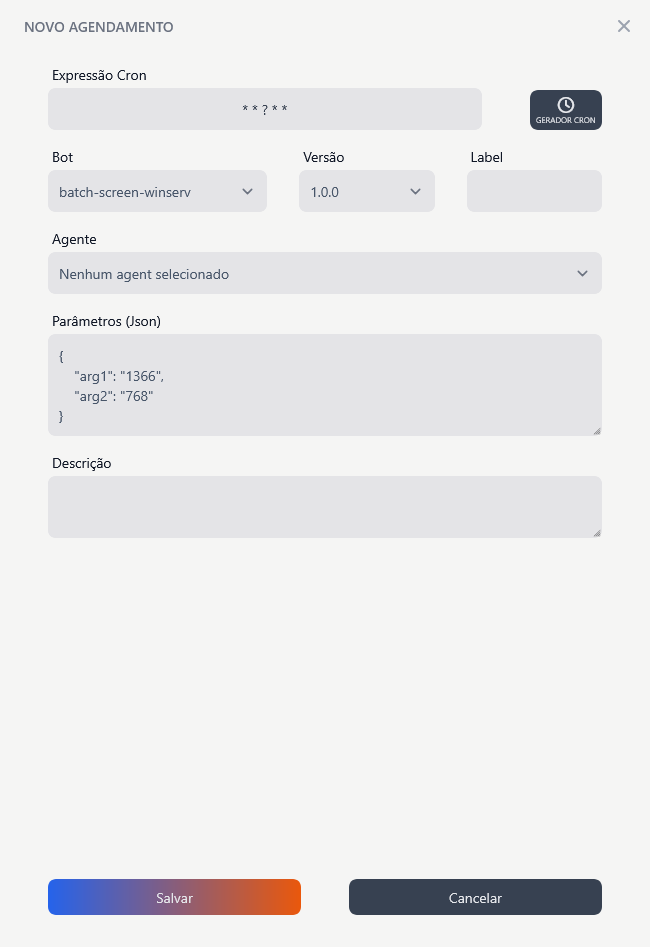
Cron Expression
- Description: Defines the frequency and execution time of the bot. The expression follows the standard Cron format, allowing flexible scheduling.
- Example:
* * * * *(Executes every minute) - Tip: Use the visual Cron expression generator available on the platform to facilitate creating the desired expression.
Bot
- Default value: First from the list of available bots
- Description: Bot that will be executed when the trigger is fired.
- Important: The bot must be previously created and available on the platform for selection.
Version
- Expected value:
X.Y.Z(example:1.0.0) - Description: Specific version of the bot to be used.
- Important: There is an option to select the bot’s
releaseversion, which will always use the latest available version.
Label
- Description: Optional identifier for the trigger. Can be used for organization or filtering.
Agent
- Current value: Select an agent from the list
- Description: Defines the agent responsible for bot execution.
- Important: The agent must be active and connected to make selection during scheduling. Possibility to define multiple agents for the same schedule, avoiding execution bottlenecks.
Parameters (JSON)
- Description: Allows entering additional parameters for the bot, in JSON format.
{
    "arg1": "1366",
    "arg2": "768"
}
Description
- Description: Field to provide a detailed description of the trigger, facilitating identification and understanding of its purpose.
Cron Generator
The platform offers a visual generator to facilitate creating Cron expressions. Below are the tabs available for configuration: Allows defining execution frequency based on minutes.
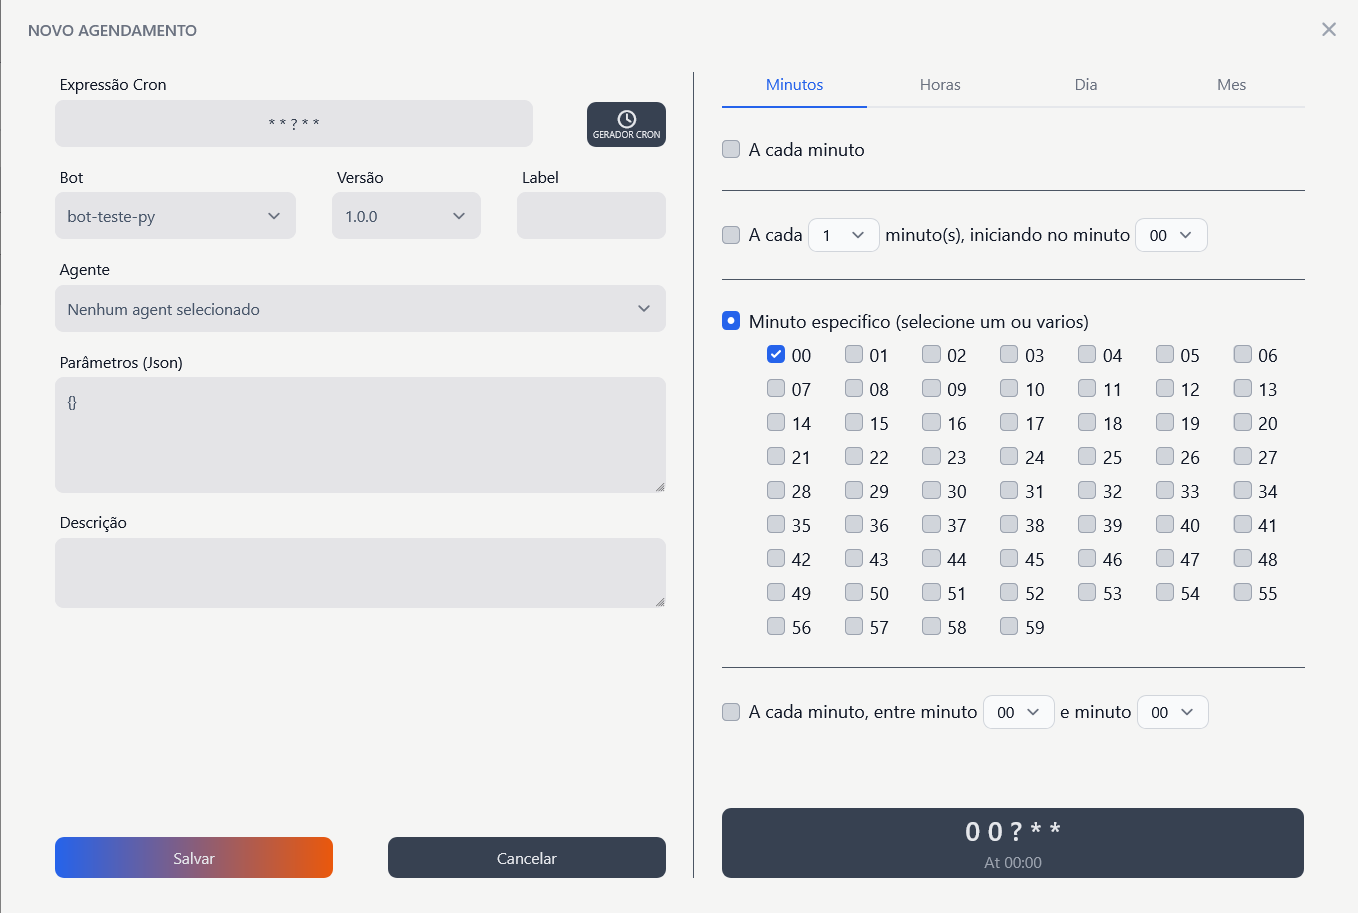
Available Settings
Minutes
- Description: Defines the minutes when the bot will be executed.
- Available options: Every X minute(s), Specific minute, Minute interval.
Hours
- Description: Defines the hours when the bot will be executed.
- Available options: Every X hour(s), Specific hour, Hour interval
Day
- Description: Defines the days of the month when the bot will be executed.
- Available options: Every X day(s) starting on Sunday, Every x day(s) starting on the first day of the month, Specific day of the month, Day interval
Month
- Description: Defines the months when the bot will be executed.
- Available options: Every X month(s), Specific month, Month interval
Cron Expression Examples
0 9 * * 1-5: Executes the bot at 9 AM Monday through Friday.30 14 * * 6,0: Executes the bot at 2:30 PM on Saturdays and Sundays.0 */2 * * *: Executes the bot every 2 hours.0 0 1 * *: Executes the bot at midnight on the first day of each month.
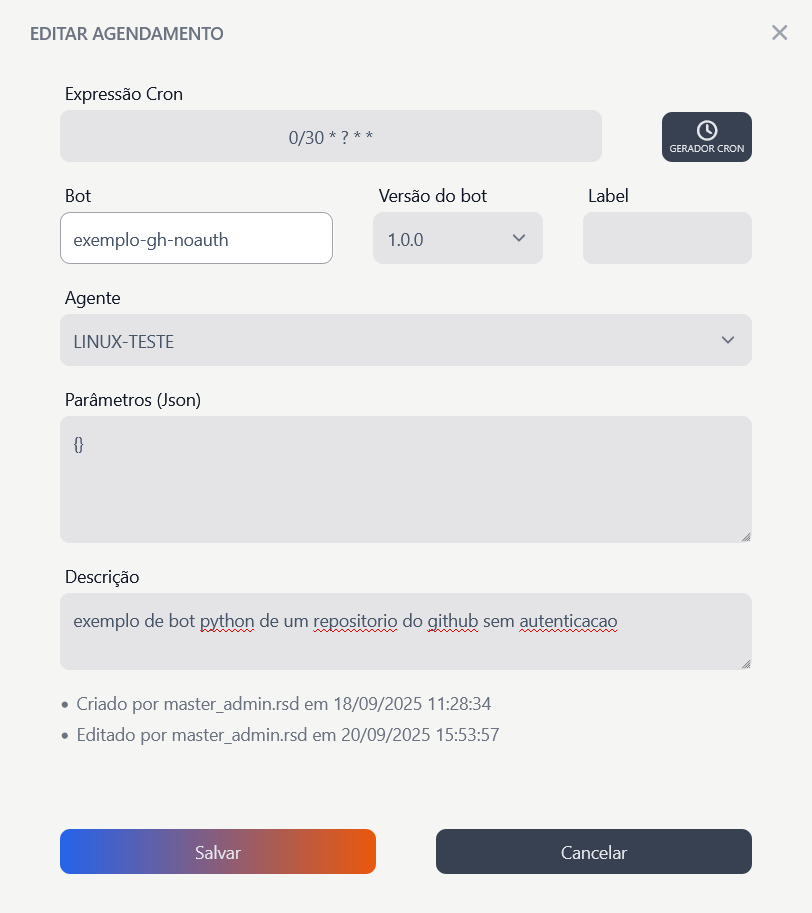
Edit Schedule
To edit an existing schedule, click the icon in the Edit column.
Note
The editing fields are the same as the creation form. For more details about each field, see the New Schedule section.
Remove Schedule
To remove a schedule, click the trash icon in the Actions column.
Tip
A confirmation modal will be requested.
Disable Schedule
To deactivate or activate a schedule, click the toggle in the Status column.
Tip
A confirmation modal will be requested.