Manual
This documentation describes the process of executing bots within the platform, from bot selection to immediate or scheduled execution. The objective is to ensure that the user understands how to configure parameters and start automation correctly.
Step 1 – Bot Selection
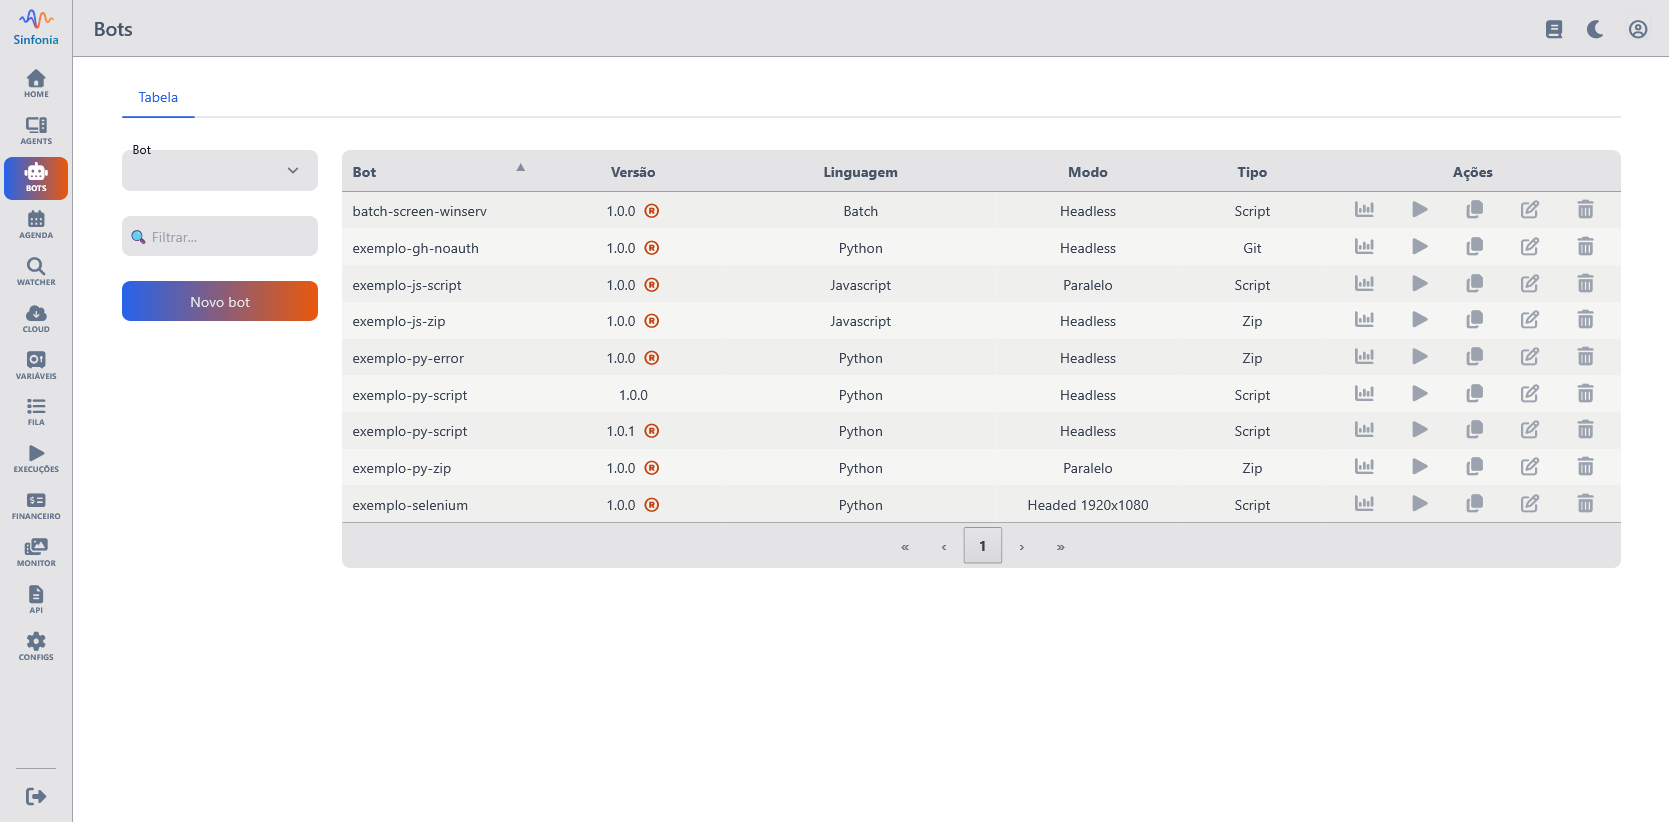
On the main bot listing screen, locate the desired bot using the side filter field or navigating through the table.
Information displayed in the listing:
| Column | Description |
|---|---|
| Name | Bot identifier name. |
| Version | Current bot version. |
| Language | Programming language used. |
| Mode | Execution mode (Headless, Headed, etc.). |
| Type | Bot origin (Script, Zip, etc.). |
| Actions | Icons to edit, delete, download, or execute the bot. |
Click the execution icon (usually represented by a “play” symbol or similar) to open the execution screen.
Step 2 – Execution Configuration
On the EXECUTE BOT screen, you can review and configure parameters before starting the automation.
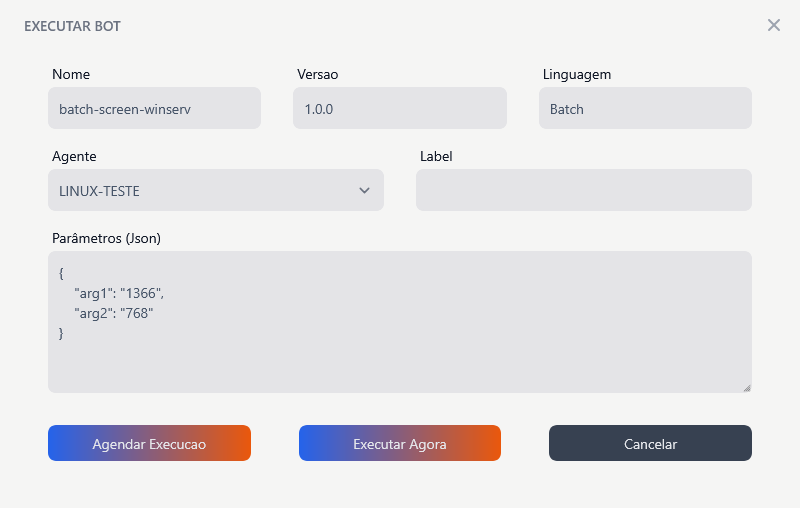
Fields
Bot
- Description: Bot that will be executed when the trigger is fired.
Version
- Description: Specific version of the bot to be used.
Language
- Description: Language used by the bot.
Label
- Description: Optional identifier for the trigger. Can be used for organization or filtering.
Agent
- Current value: Select an agent from the list
- Description: Defines the agent responsible for bot execution.
- Important: Only 1 agent can be selected for this type of trigger.
Parameters (JSON)
- Description: Allows entering additional parameters for the bot, in JSON format.
{
    "arg1": "1366",
    "arg2": "768"
}
Actions
Schedule Execution
- Description: Allows scheduling bot execution for a specific date and time.
- Important: The scheduled time must be in the future. It’s not possible to schedule an execution for a time that has already passed.
Execute Now
- Description: Starts bot execution immediately, sending it to the selected agent.
Cancel
- Description: Cancels the operation and returns to the bot listing screen.
Last updated on